
Mastering basic knife cuts is essential to become a better home cook or chef. In this guide, you will learn the classic cuts including julienne, brunoise, or how to dice any vegetable with consistency.
Save This Recipe!
The purpose of this guide is to be your resource on the different classic knife cuts and their uses.
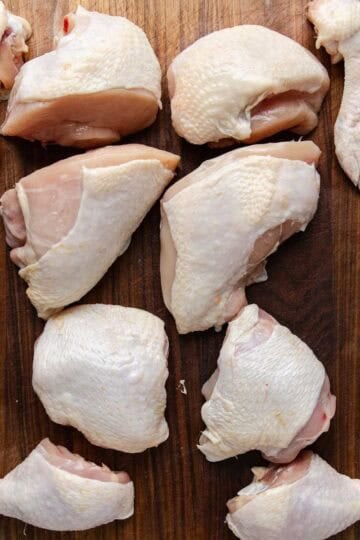
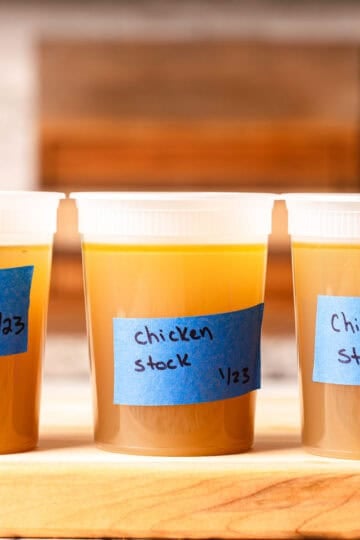
Whether you want to Break Down A Whole Chicken, or rough chop vegetables for a Roasted Chicken Stock we cover everything in this blog post.
Jump to:
Knife Safety 101
- Right Tool, Right Job: Always use the correct knife for the task at hand. You wouldn't use a paring knife to break down a squash, and you don't need a chef's knife to peel an apple.
- Cut Away: Always cut away from your body. If the blade slips, you want it heading toward the board, not your torso.
- Stay Sharp: Keep your knives sharp. It sounds counterintuitive, but a dull knife is actually more dangerous than a sharp one because it requires more force and is much more likely to slip.
- The "Travel" Position: When walking through the kitchen with a knife, keep the point aimed down at the floor and the blade toward your side.
- A Falling Knife Has No Handle: Never try to catch a falling knife. Just step back, keep your hands up, and let it hit the floor.
- The Sink Rule: Never leave a knife in a sink full of soapy water. Someone (likely you) will eventually reach in and get a nasty surprise.
- Anchor Your Board: Place a damp kitchen towel under your cutting board before you start. A board that slides around is a disaster waiting to happen.
Knife Sharpening vs. Honing

How To Sharpen A Knife
A sharp knife is a safe knife. Here is the Whetstone (affiliate link) I use for all my knives.
- Prep the Stone: Submerge your whetstone in water for at least 15 minutes. A dry stone will damage your blade.
- Find Your Angle: Place the heel of the knife on the stone. Aim for a 15° angle for Japanese knives or a 20° angle for German/Western knives.
- The Motion: Maintaining that consistent angle, apply firm pressure and push the blade away from you in one long, sweeping motion. Ensure the entire length of the edge-from heel to tip-makes contact with the stone.
- The Finish: Repeat this process on both sides of the blade until you feel a "burr" (a slight lip of metal) form, signaling the edge is sharp.
Want to see it in action? Here is the video.
Honing Your Knife
A honing steel does not sharpen your knife; it realigns, or "hones," the edge of the blade that gets folded over during use. For the best results, hone your knife every time you pull it out of the knife block.
- The Angle: Hold your blade against the steel at a 20-degree angle.
- The Motion: Draw the blade along the entire length of the steel, moving from the heel to the tip. Repeat this 4-5 times on each side.
- The Pro Safety Tip: Instead of honing in the air, place the tip of the honing rod straight down on your cutting board for maximum stability and a consistent angle.
The Pinch Grip: The Proper Way to Hold a Chef Knife

Most home cooks struggle with control because they use the "Hammer Grip" (holding only the handle) or the "Pointer Finger" method. Resting your finger on the spine lacks stability and leads to fatigue over time.
How I was taught in Culinary School was to use the Pinch Grip:
Step 1: By "choking up" on the steel, you gain more control. The knife becomes an extension of your arm.
Step 2: Pinch the base of the blade (the heel) between your thumb and the side of your pointer finger.
Step 3: Wrap your remaining three fingers firmly around the handle.
Claw Grip

Let's not forget about our other hand, or our guide hand. Grip whatever you are cutting with your finger tucked in (claw grip) and rest the knife against your knuckles.
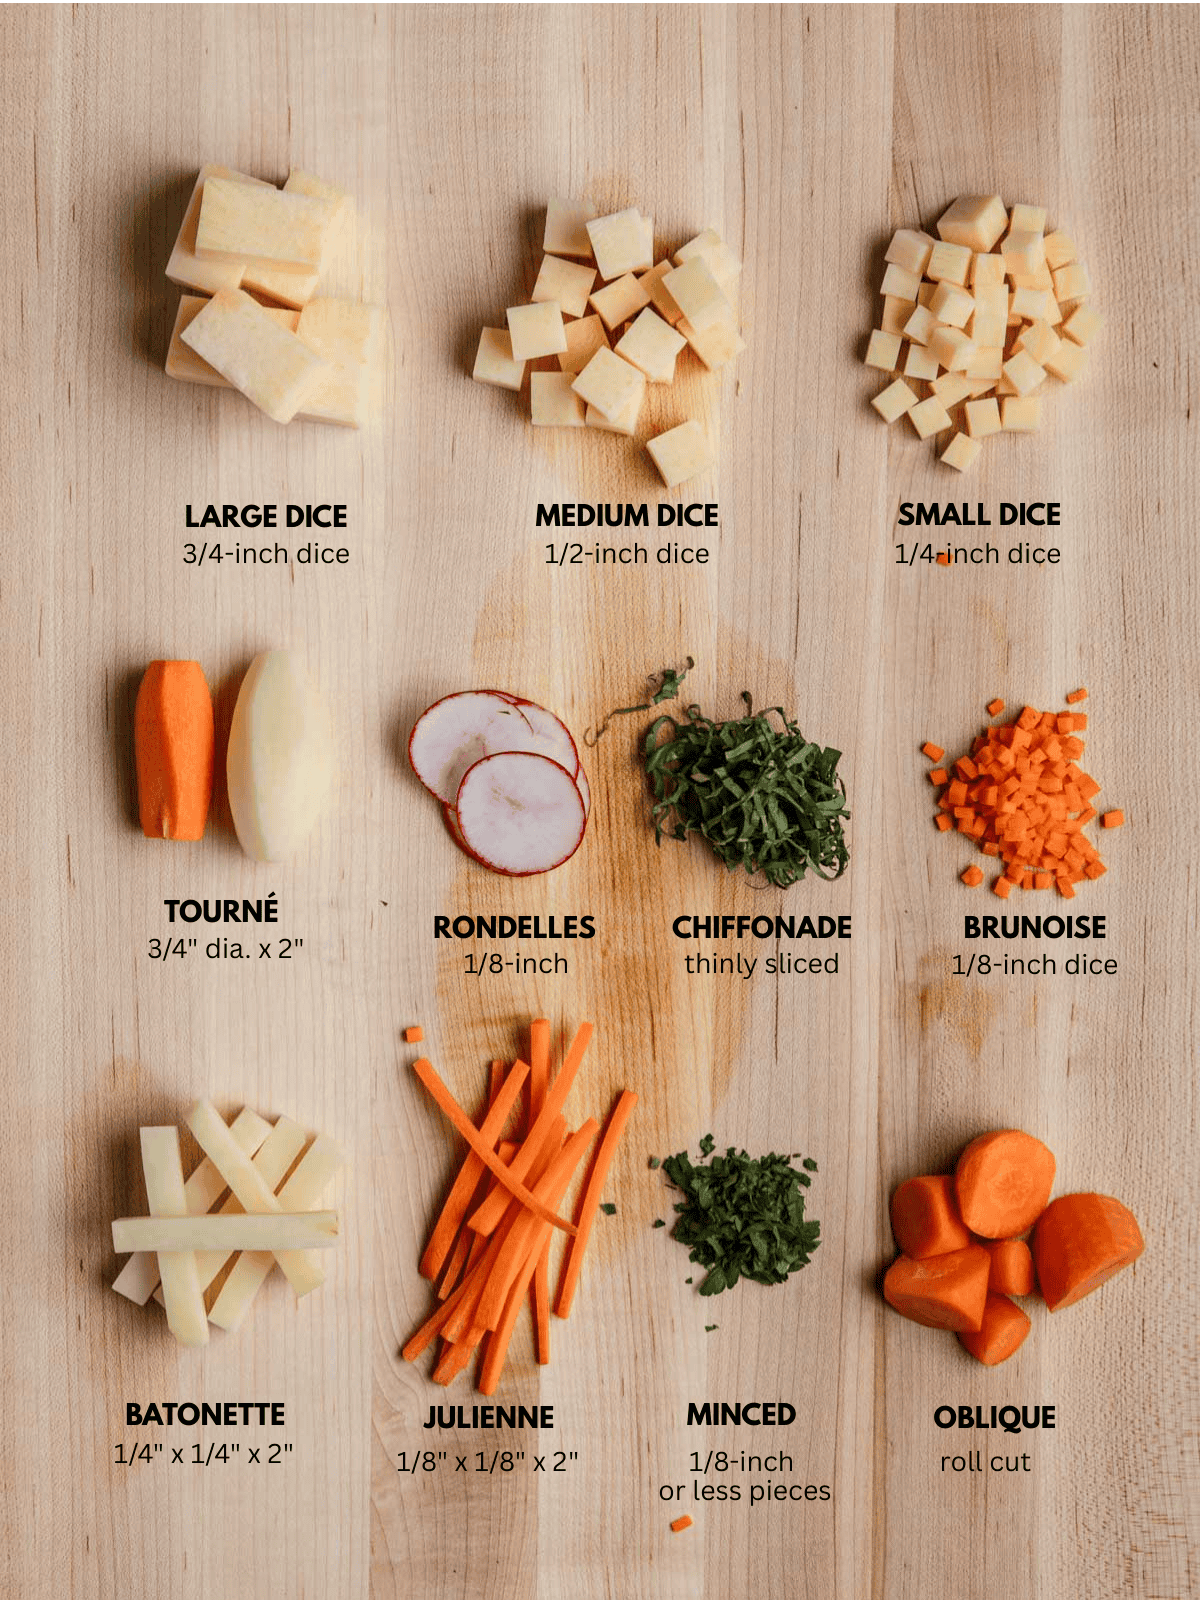
Julienne
Julienne - (ju-lee-en) a stick-shaped cut with the dimensions of ⅛ inch x ⅛ inch x 2 inches ( 3mm x 3mm x 5cm).
What's it used for: A useful cut for salads and slaws, raw julienned apples or root vegetables easier to eat than large chunks.
The Technique: Peel the vegetable (carrot) and square off the sides. Cut even slices of thickness ⅛ inch (3 mm).
Stack the slices and cut them evenly into sticks that are the same thickness as the slices.

Brunoise
Brunoise - (broo-nwaz) a cube-shaped cut with dimensions of ⅛ inch x ⅛ inch x ⅛ inch (3mm x 3mm x 3mm).
What's it used for: Shallots, carrots, or leeks will melt into a sauce like Chicken Demi Glace so you don't have that chunky texture.
The Technique: The first step is to julienne your vegetable, then come back and dice it into ⅛ inch (3mm) cubes.

Batonnet
Batonnet -(bah-toh-nah) a stick shaped cut with dimensions of ¼ inch x ¼ inch x 2 inches (6mm x 6mm x 5 cm).
What's it used for: This knife cut is great for crudité platter where your cutting vegetables served alongside a dip.
The Technique: Peel the vegetable and square off the sides. Cut even slices of thickness ¼ inch (6 mm).
Stack the slices and cut them evenly into sticks that are the same thickness as the slices.

Small, Medium, and Large Dice
Small, medium, and large dice are made by first cutting the item into sticks, and then making cuts perpendicular.
Small Dice - First we need to start out with a Batonnet ¼ inch x ¼ inch x 2 inches (6mm x 6mm x 5 cm). Next, we cut perpendicular into ¼ inch (6mm) cubes.
Medium Dice - A ½ inch (1.2 cm) cut from a ½ inch (1.2 cm) stick produces a medium dice.
Large Dice - A ¾ inch (1.8 cm) cut from a ¾ inch (1.8 cm) stick produces a large dice.

Diagonal Cut (Bias)
Diagonals are oval-shaped slices of vegetables or fruits. They are cut at an angle for more surface area.
What it's use for: Cutting vegetable on the bias are great in salads, stir fry's, or on the grill.
The Technique: Peel the vegetable (if desired) and place it on the cutting board. Position the knife at an angle to the item being cut and slice it evenly.

Oblique Cut
Oblique Cut - (oh-BLEEK) or roll cut are small pieces with two angle-cut sides.
What it's use for: It's a great way to cut root vegetables to roast in the oven, or to throw in soups and stews.
The Technique: Placed the peeled vegetable on a cutting board. Holding the knife at a 45-degree angle, make the first cut. Roll the item a half turn, keeping the knife at the same angle, and make another cut.

Slicing
To slice is to cut an item into uniform, thin pieces using a smooth, fluid motion. When applied to leafy vegetables like the head of cabbage shown below, this technique is often referred to as shredding.
What it's use for: Shredding vegetables like cabbage, iceberg, or romaine lettuce is great for slaws, taco's, and salads.
The Technique: Use the full length of the blade, starting at the tip and sliding through to the heel.

Chiffonade
Chiffonade - (chef-fon-nahd) is to finely slice or shred leafy vegetables or herbs.
What it's used for: For herb garnishes. Basil, sage, or mint is cut into thinly sliced French ribbons. You can use this technique with kale, spinach, or swiss chard for a quick sauté.
The Technique: Stack several leaves on top of each other and roll them tightly like a cigar. Make fine slices across the leaves while holding the leaf roll tightly.

Tourné
Tourné - (torr-nay) In a professional kitchen, the Tourné (French for "turned") is the most advanced and "old-school" knife cut. It results in a seven-sided, football-shaped vegetable (traditionally potatoes, carrots, or turnips) that measures roughly 2 inches long.
What it's used for: In fine-dining restaurants root vegetables are prepared this way to show off technique and skill.
The Technique: Cut the root vegetable into 2 inch (5cm) x 1 inch (2 to 2.5 cm). Each piece should have flat ends. ( Potatoes, turnips, and beets may be cut into 6 or 8 pieces; carrots can be cut into 2-inch lengths.)
Holding the vegetable between the thumb and forefinger, use a tourné knife or pairing knife to cut seven curved sides, creating a flat-ended, football-shaped item.
Pro Tip: This is a technique that our chef instructors say we will probably never use int the real world, but it's good to know how to do. If you want to practice I recommend using a birds beak knife for this technique.

Dicing an Onion
Step 1. Peel the onion.
Cut the onion in half through the root and peel off the skin.
Step 2. Cut Slices.
Leaving the core in tact to hold the onion together cut parallel slices of desired thickness vertically through the onion from the root toward the stem without cutting through the root end.
Step 3. Dice. Turn the onion and cut slices perpendicular to the other slices to produce a dice.

Chopping Parsley
What it's used for: Finely chopped parsley can be use for a garnish on a lot of your main dishes or Fresh Italian parley and be roughly chopped and thrown into a recipe like my Salmon Stew at the end for flavor.
The Technique: Wash the parsley in cold water and drain well. Remove the parsley sprigs from the stems.
Grip the knife in one hand. With the other hand spread flat, hold the knife's tip on the cutting board. Keeping the knife's tip on the board, chop the parsley by rocking the knife up and down.

Chopping Garlic
What it's used for: Chopped garlic is used in applications from sautéed vegetables to soups and stews.
The Technique: Break the garlic into individual cloves with your hands. Lightly crush the cloves using the flat edge of a chef's knife, then peel off the skin.
With a flat hand, hold the knife's tip on the cutting board. Using a rocking motion, chop the garlic very finely.
Pro Tip - Create a smooth garlic paste by sprinkling coarse salt over chopped garlic and using the side of your blade to smear it against the board in a dragging motion.

Mandoline
The mandoline is a multi-use tool perfect for uniform slices with an adjustable depth for everything from paper-thin garnishes to thicker cuts. By swapping the interchangeable 'teeth' blades, you can also quickly switch from flat slicing to julienne and matchstick cuts.
What it's used for: Great for salad prep by thinly slicing cucumbers, radishes, or any type of vegetable uniformly and quickly.
The Technique: Start by squaring off your vegetable ends to create stability. Always keep your fingers tucked into a 'claw' grip, and when you reach the very end of the vegetable, discard the last bit-it's never worth risking a fingertip for one final slice.

FAQ's
Ingredients that are the same size cook at the same amount of time. If you throw a thin carrot slice into a pan with a big chunk, that thin piece is going to turn to mush before the big one even softens.
A rough or coarse chop is cutting vegetable into a large dice that are not uniform in shape. This cutting technique is used in soups that will be pureed or in stocks.
I like to keep a bowl next to the cutting board where I add all my vegetables scapes, because later I will use that for stock.

Comments
No Comments